Connect your GitHub
Open the personal delivery link from your purchase email to connect your GitHub username — or email info@roadmaplodging.com.
What happens next
- 1
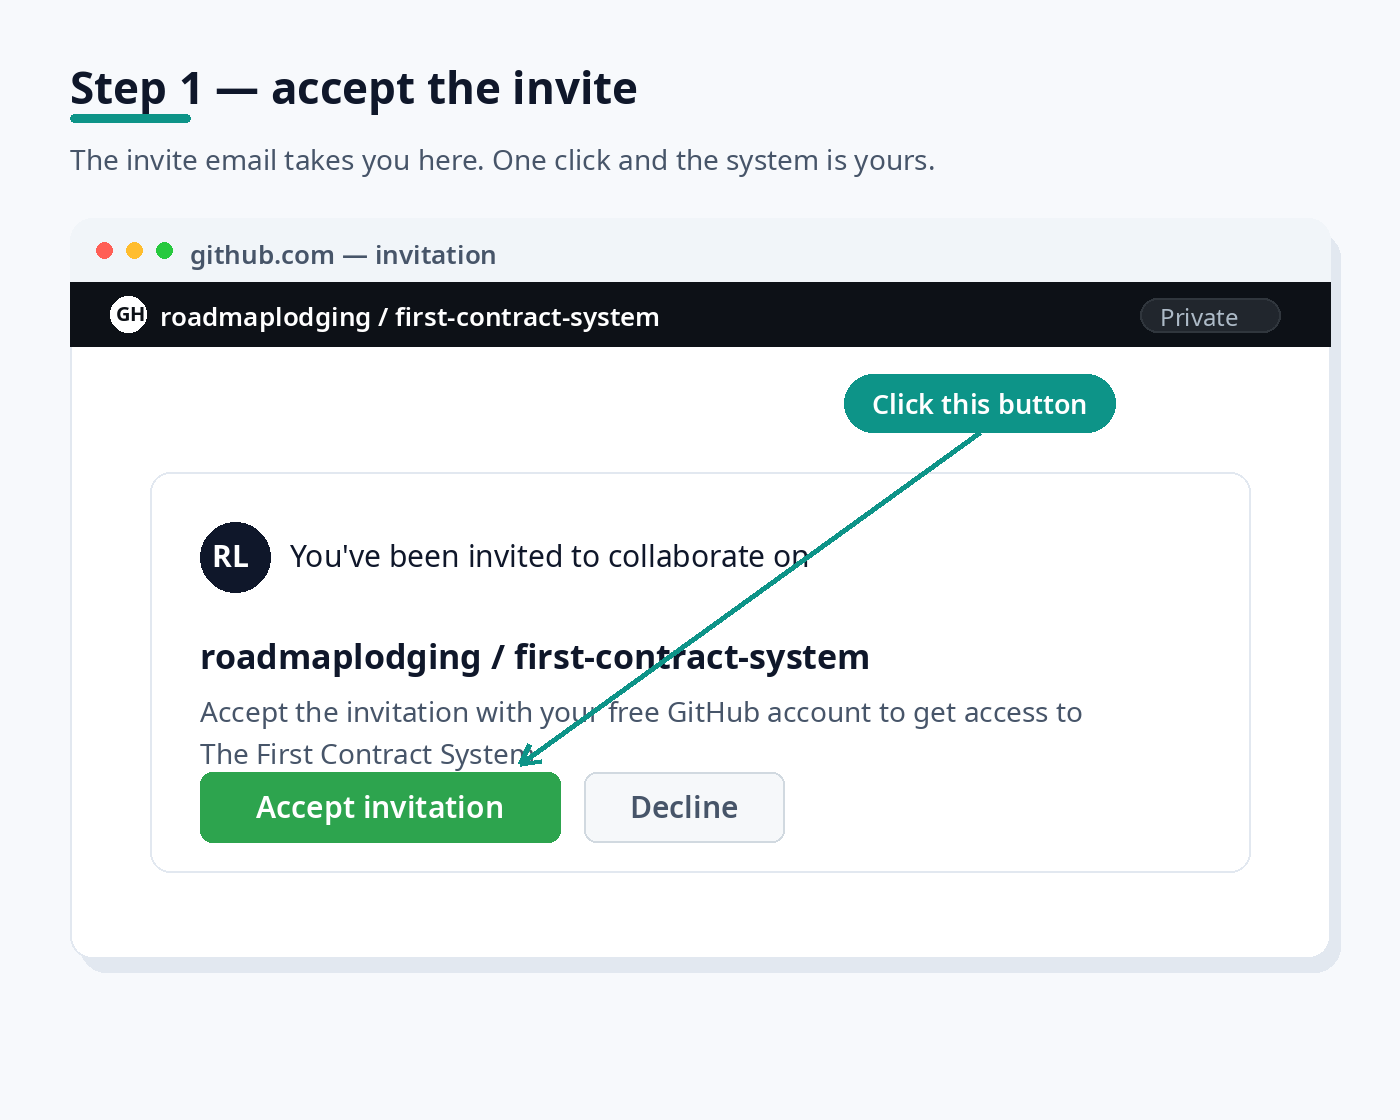
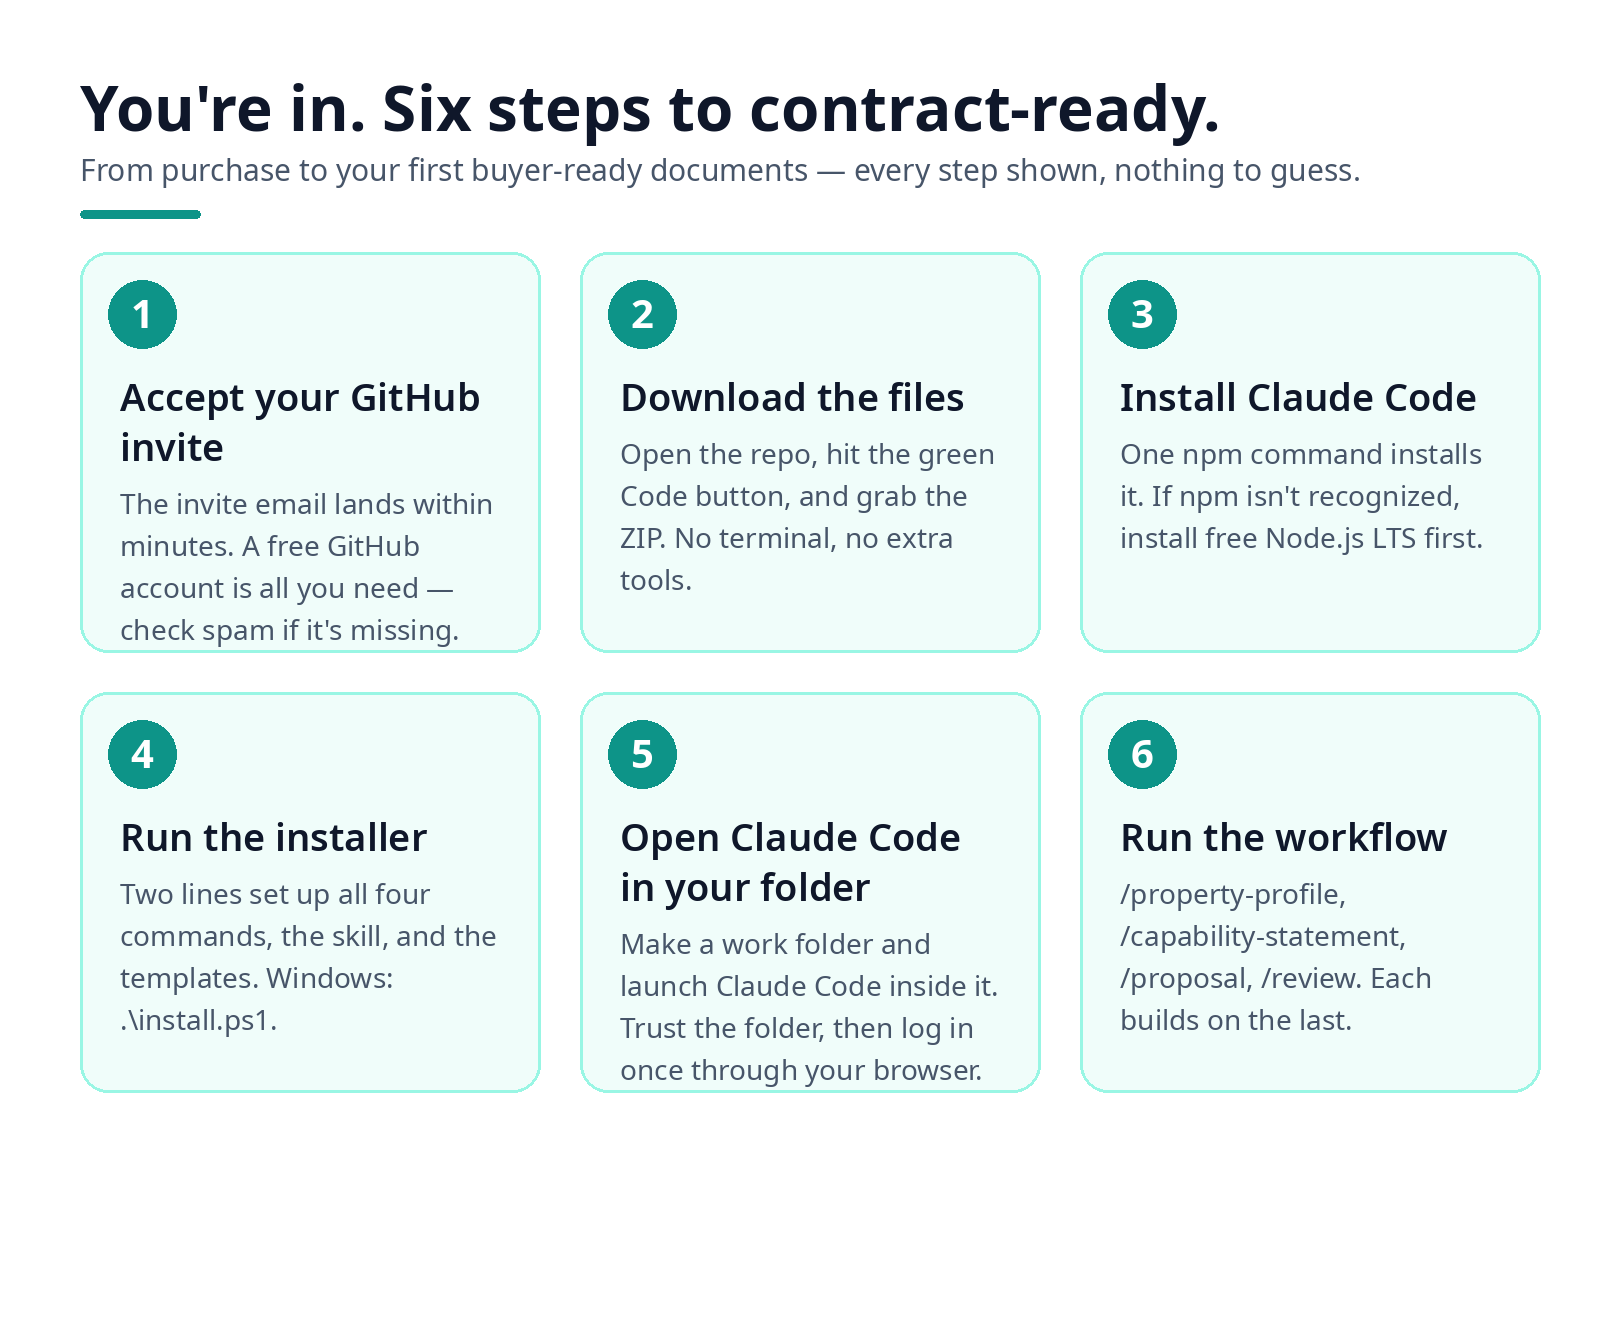
Accept your GitHub invite.
A free GitHub account is all you need. Check spam if the invite doesn't arrive within a few minutes.
- 2
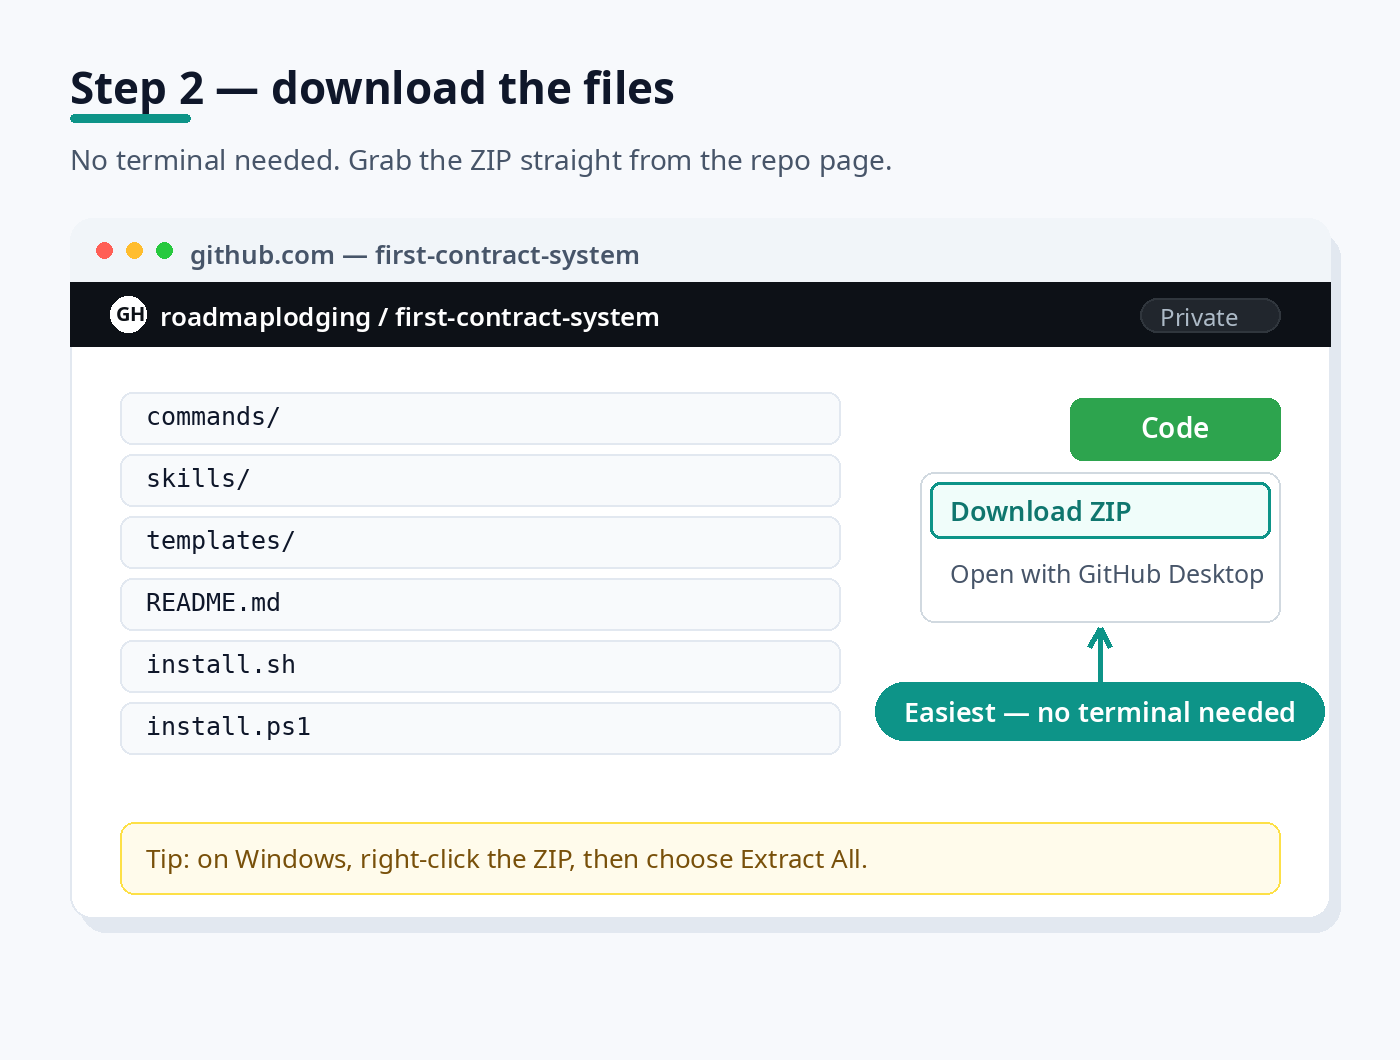
Download the files.
Click the green Code button, then Download ZIP — no terminal needed. On Windows, right-click the ZIP, then choose Extract All.
- 3
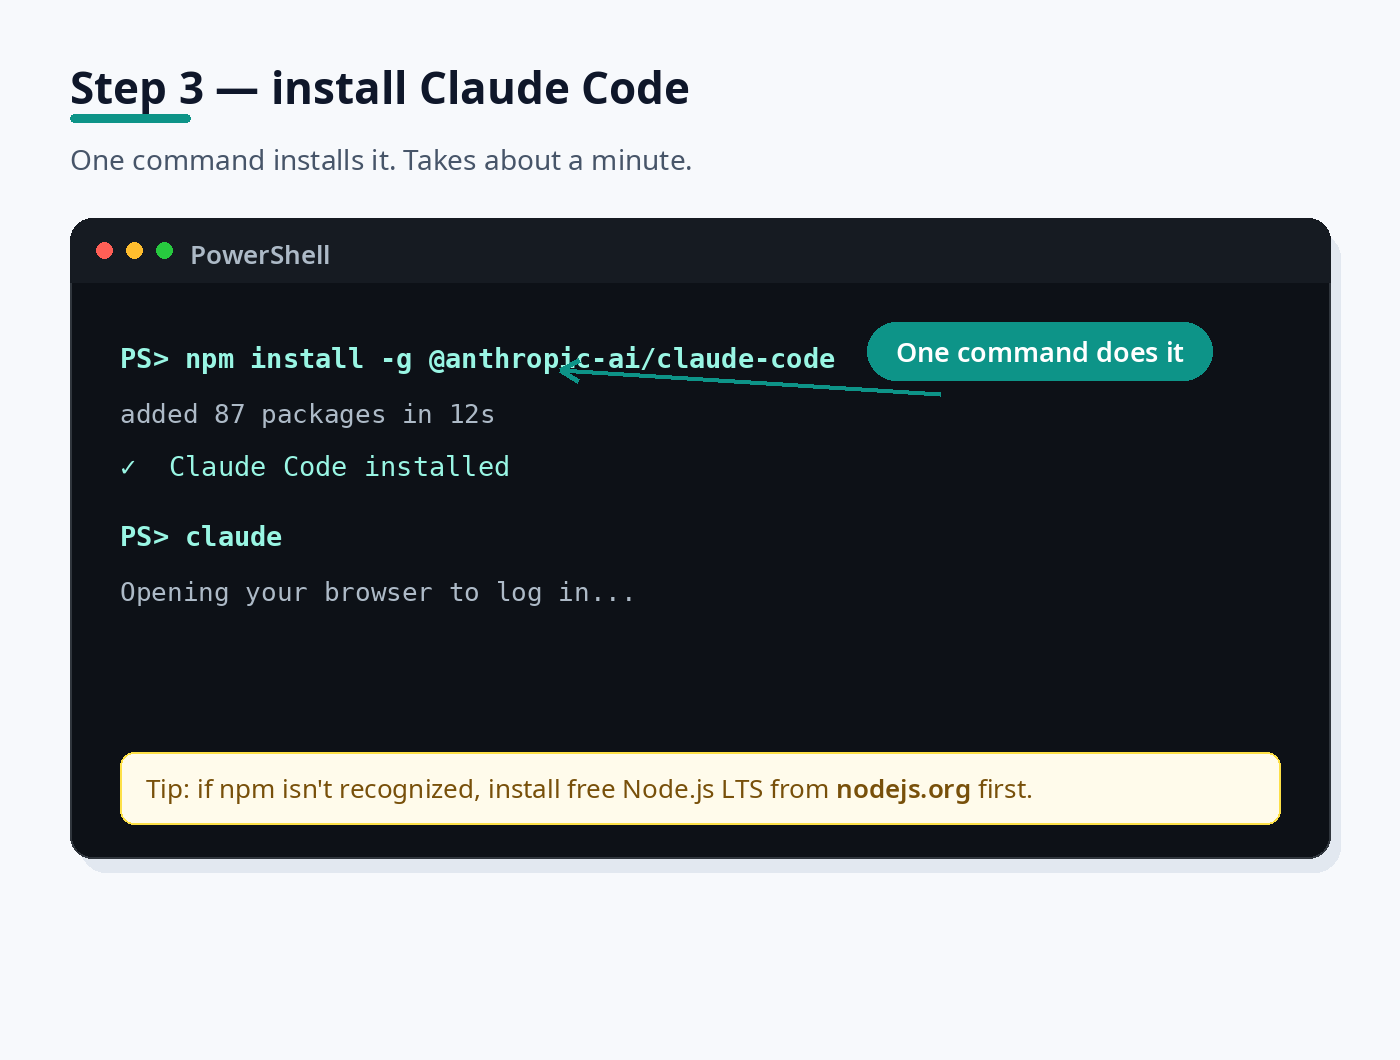
Install Claude Code.
One command installs it. If your computer doesn't recognize npm, install free Node.js LTS from nodejs.org first, then re-run the command.
- 4
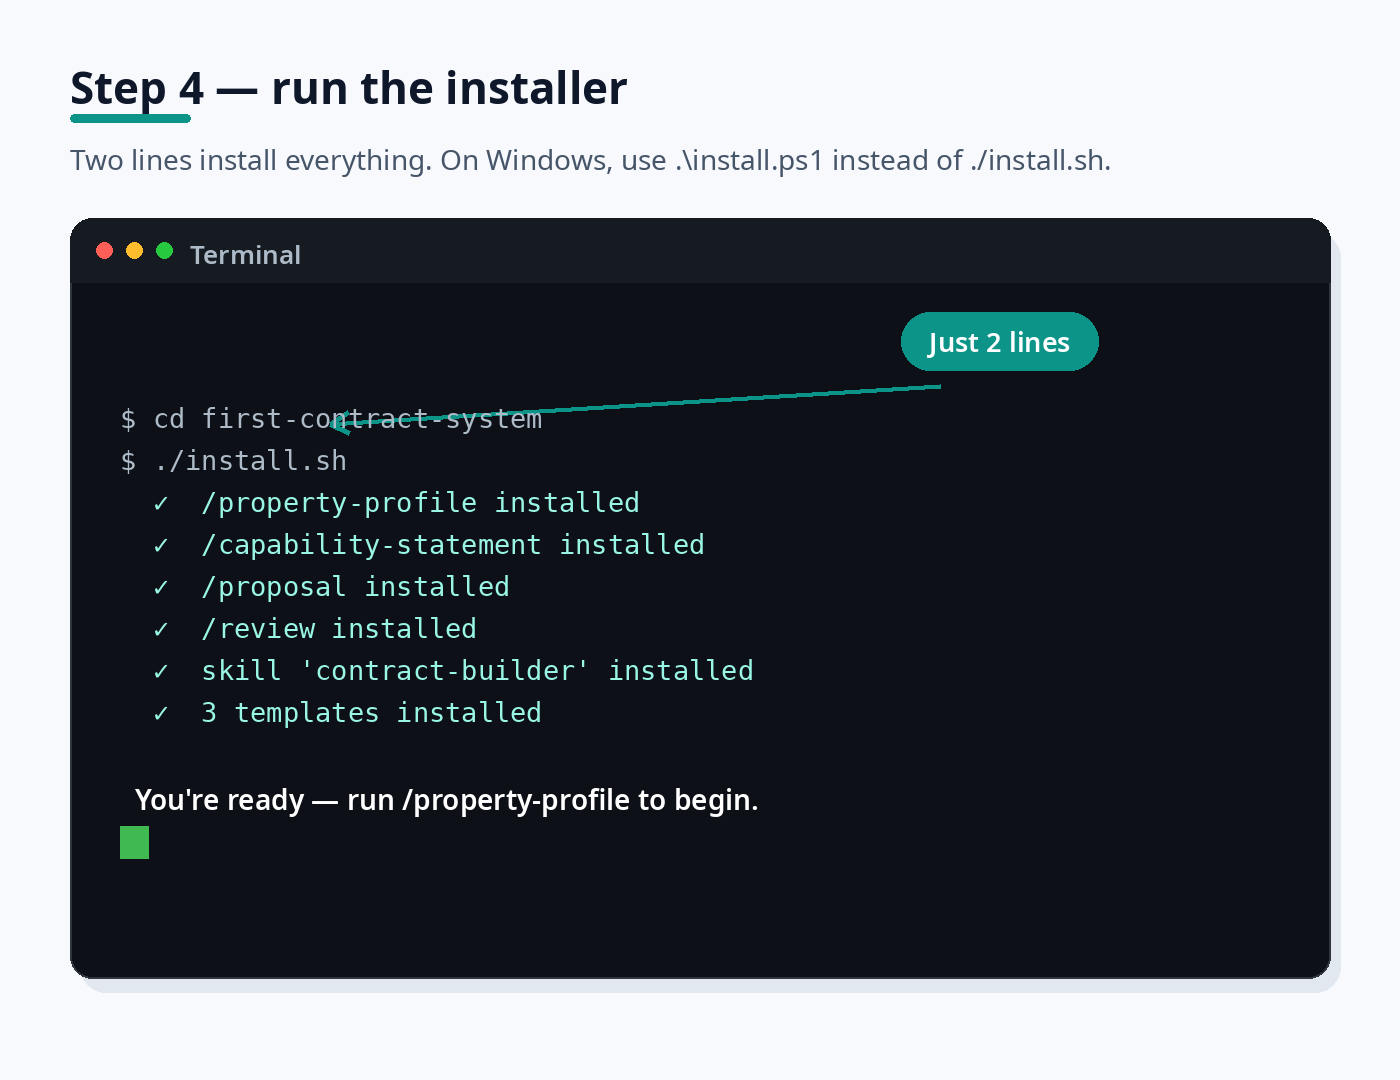
Run the First Contract System installer.
Two lines set up all four commands. On Windows, run .\install.ps1 instead of ./install.sh.
- 5
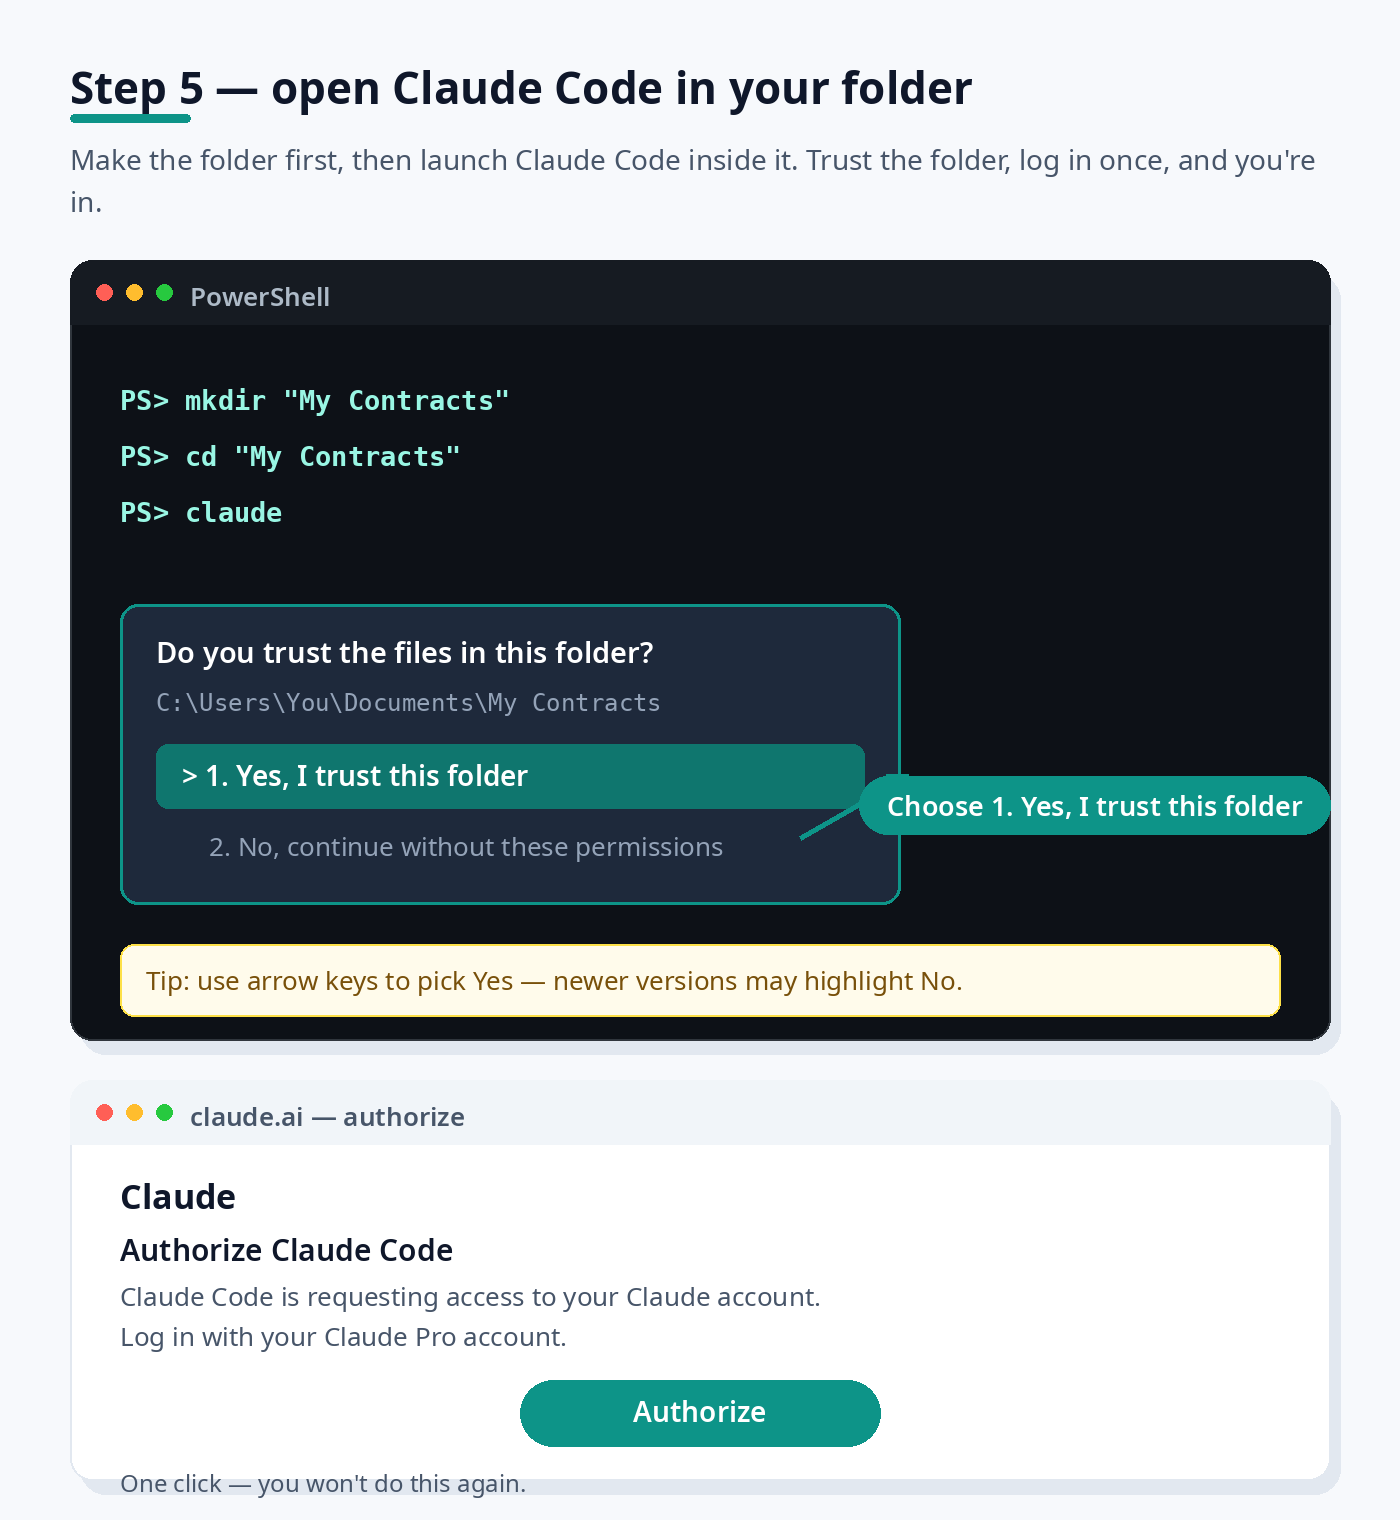
Open Claude Code in your work folder.
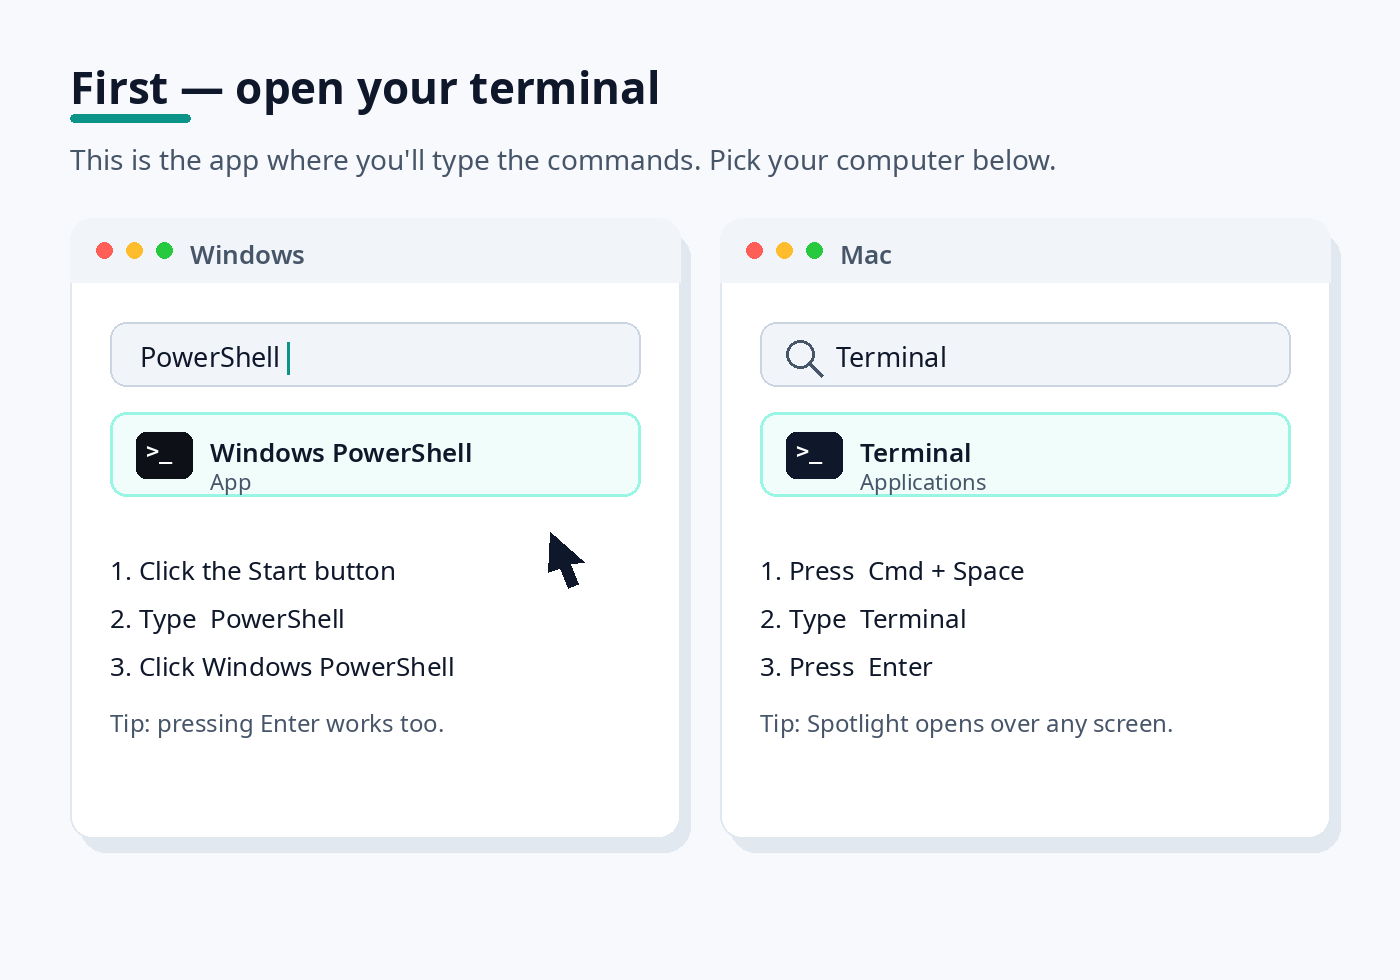
Make one folder for your contracts and open Claude Code inside it: mkdir "My Contracts", cd "My Contracts", then claude. When it asks 'Do you trust the files in this folder?', choose 1. Yes, I trust this folder — it's your own folder. On newer versions the 'No' option may be highlighted, so use your arrow keys to move to Yes before pressing Enter. Then log in with your Claude Pro account in the browser and click Authorize. One time only — you'll stay logged in.
- 6
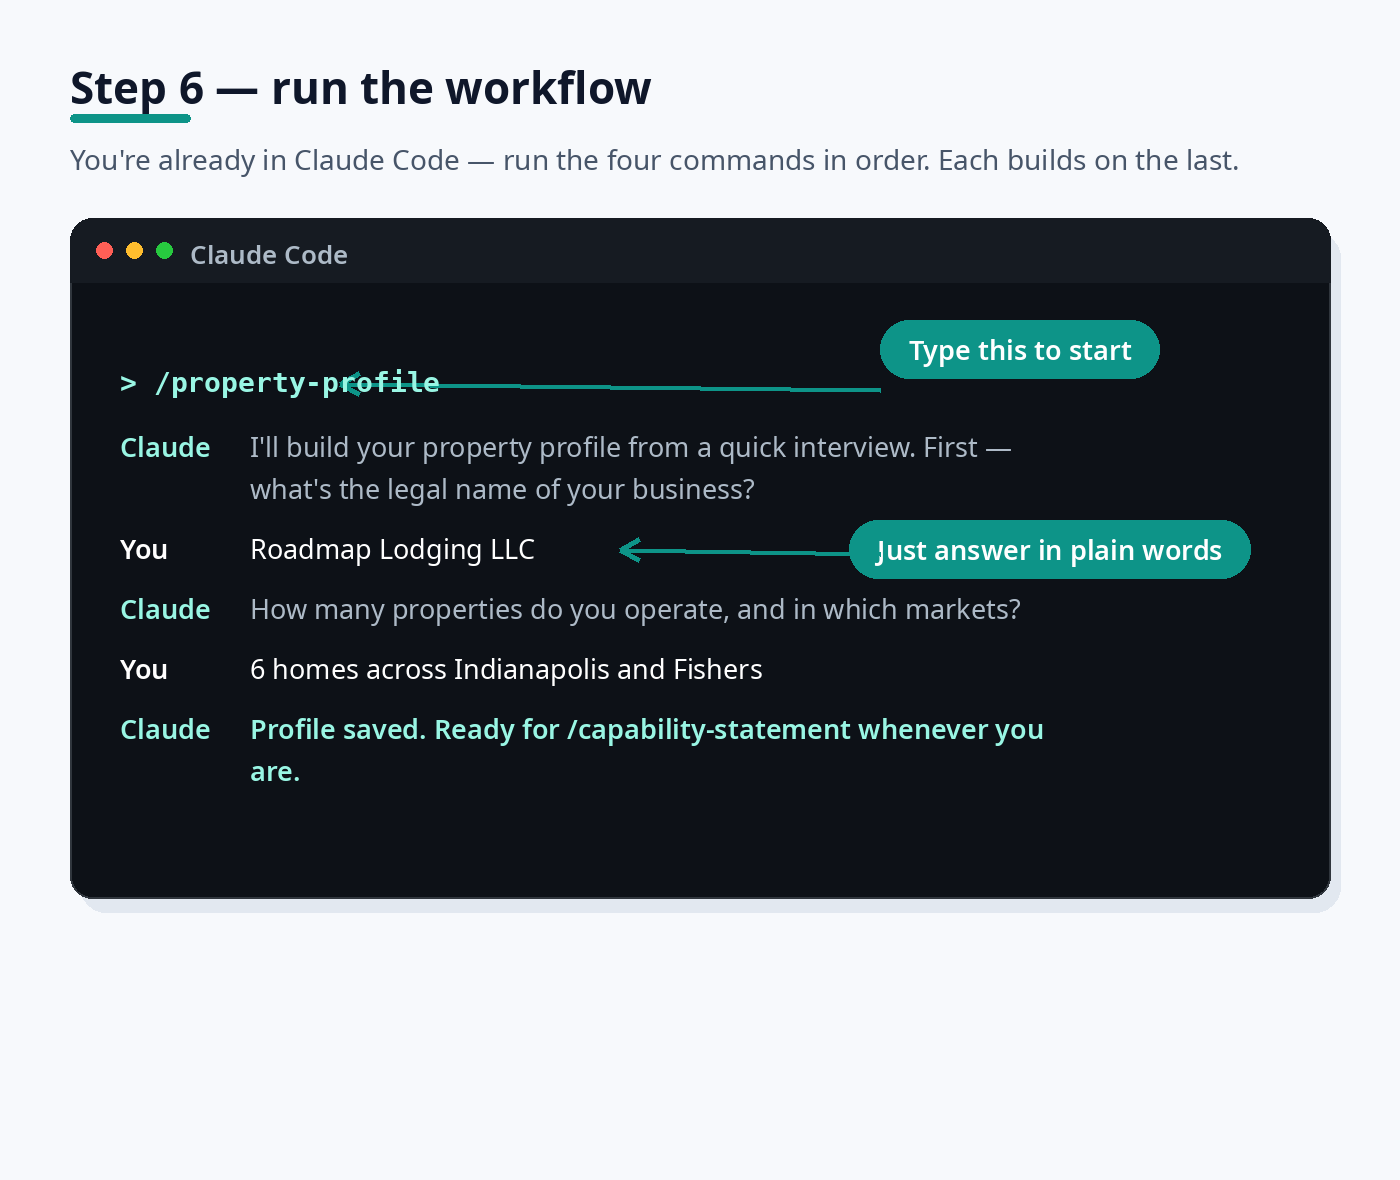
Run the workflow in order.
Run /property-profile, then /capability-statement, /proposal, and /review. Each builds on the last — just answer in plain words.
What's inside
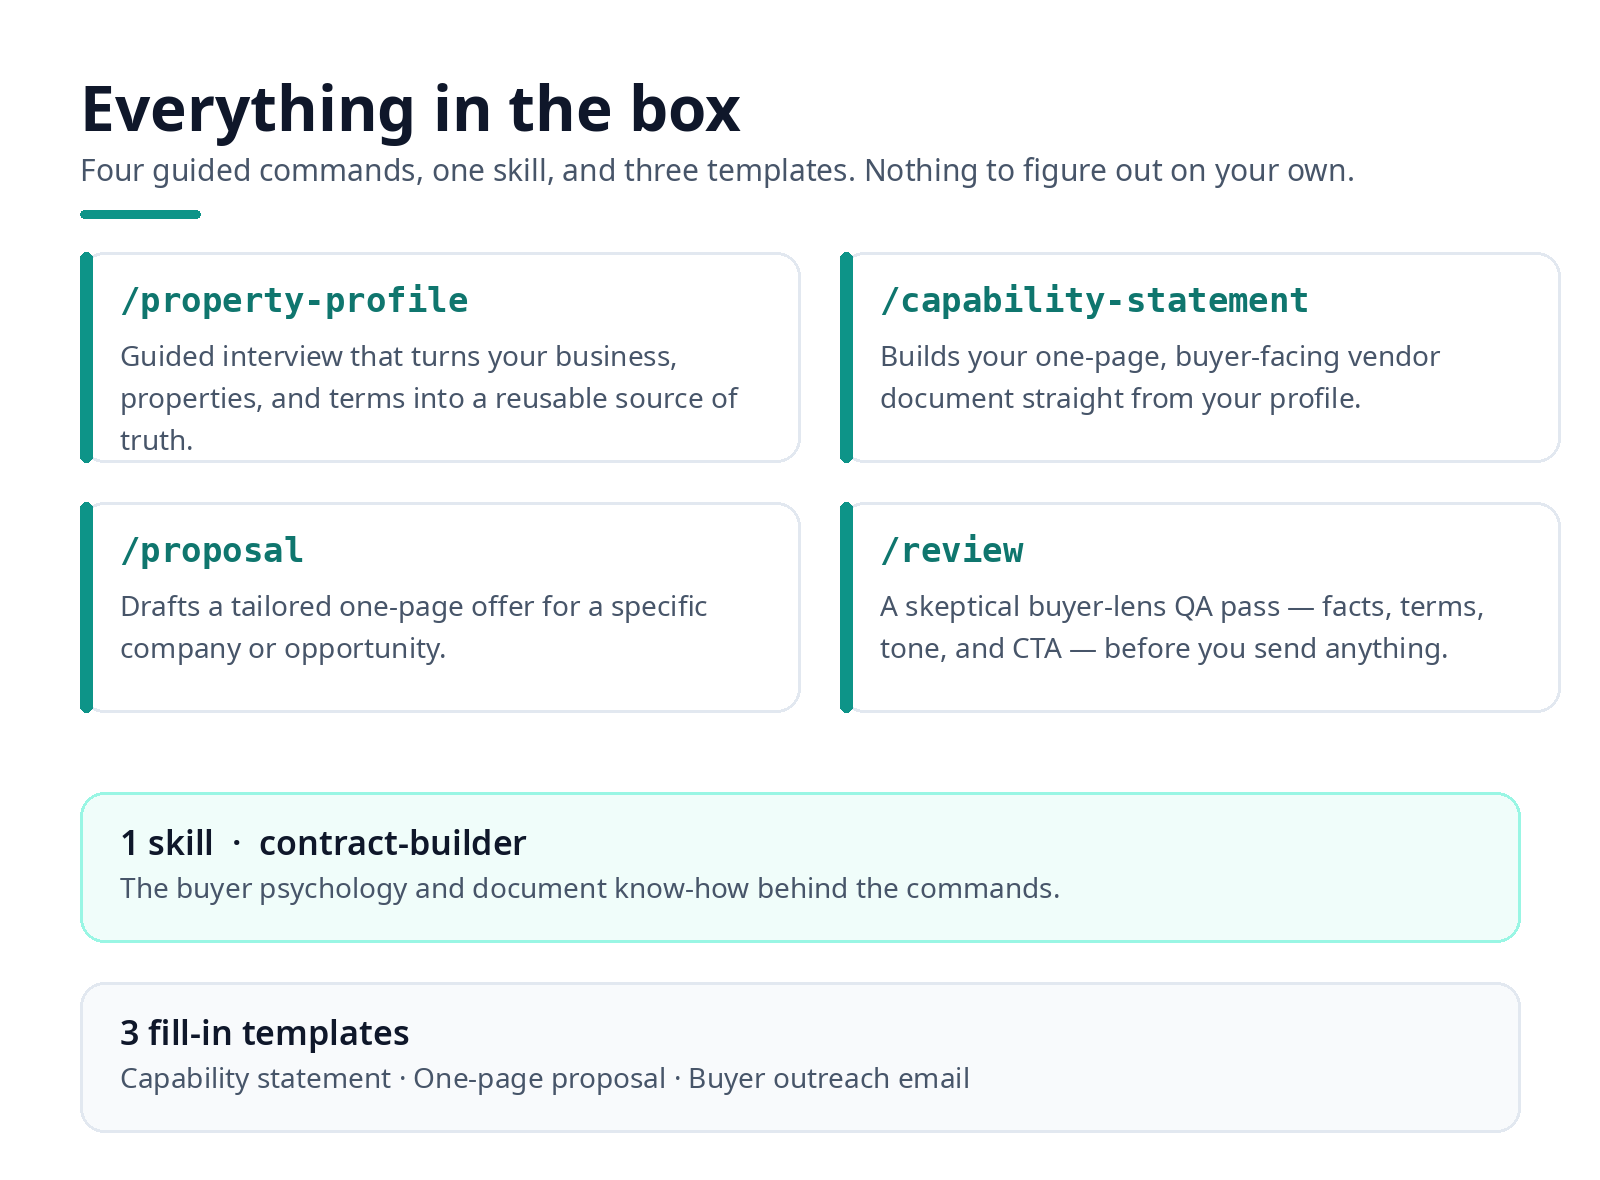
- Four Claude Code commands: /property-profile, /capability-statement, /proposal, /review
- One skill: contract-builder — the buyer psychology and document know-how behind the commands
- Three fill-in templates: capability statement, one-page proposal, buyer outreach email
See what you'll create
This is what the finished documents look like. Yours will be built from your own properties.
Watermarked sample — fictional data for illustration.
Watermarked sample — fictional data for illustration.
What you need
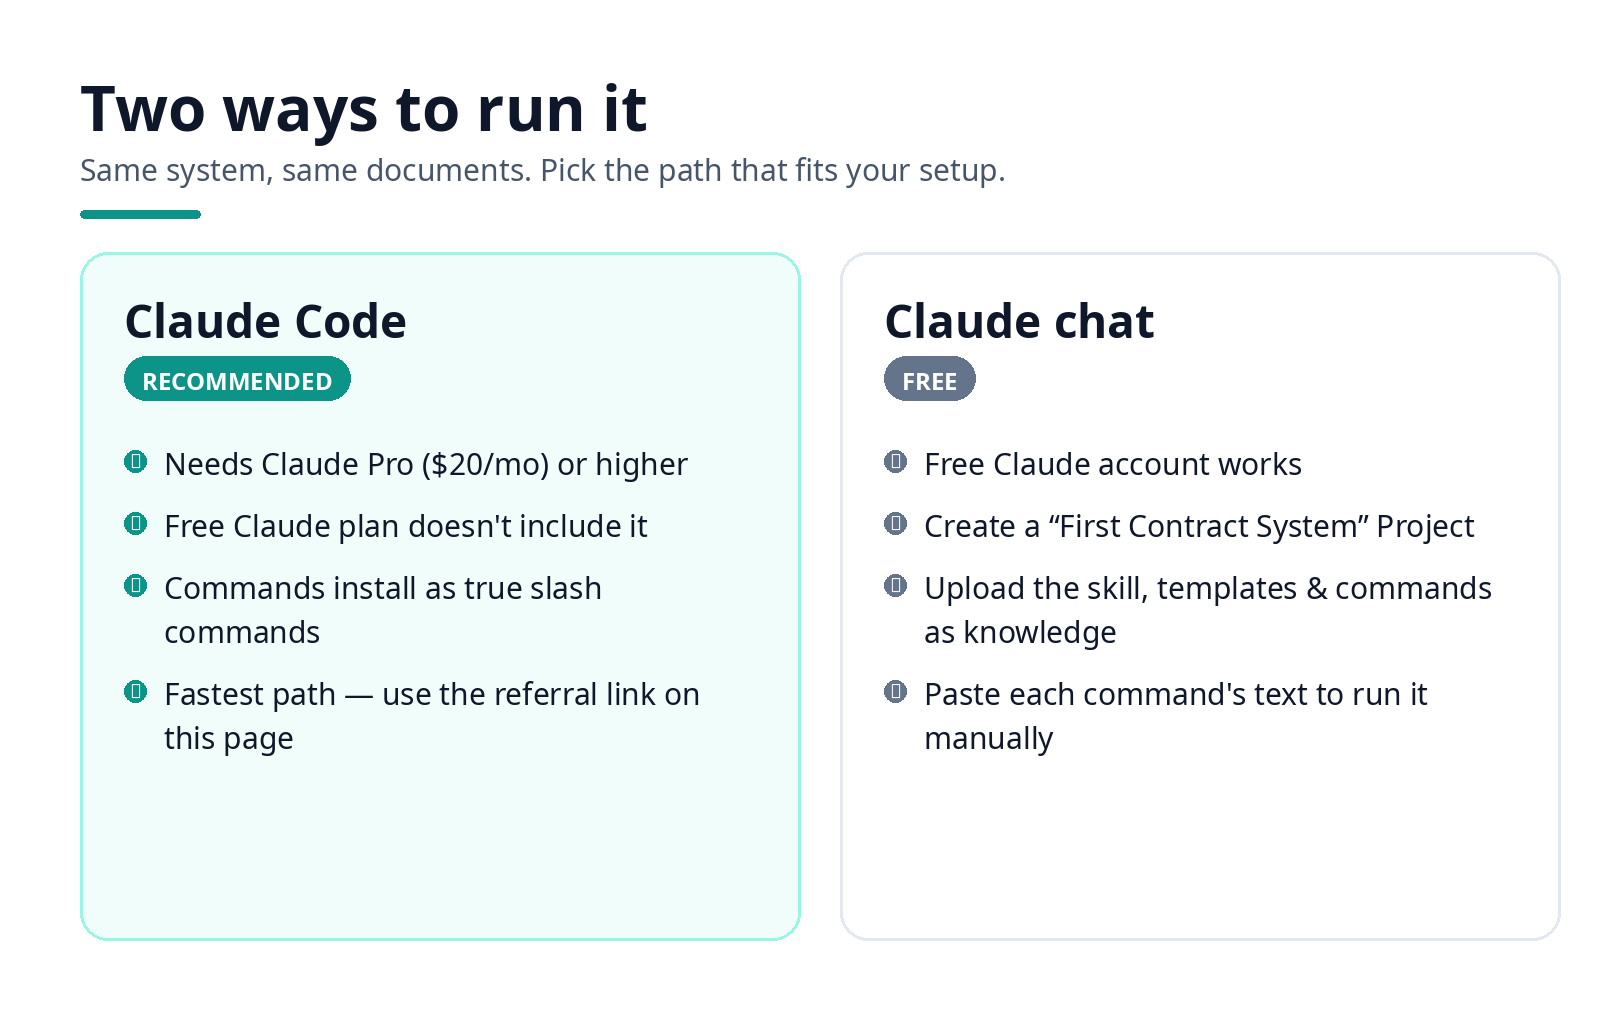
- Claude Code (recommended): needs a Claude Pro subscription ($20/mo) or higher — the free Claude plan doesn't include Claude Code. Get set up here: Get Claude
- A GitHub account (free) to accept the repo invite.
- Node.js (free download — only needed for the Claude Code install path).
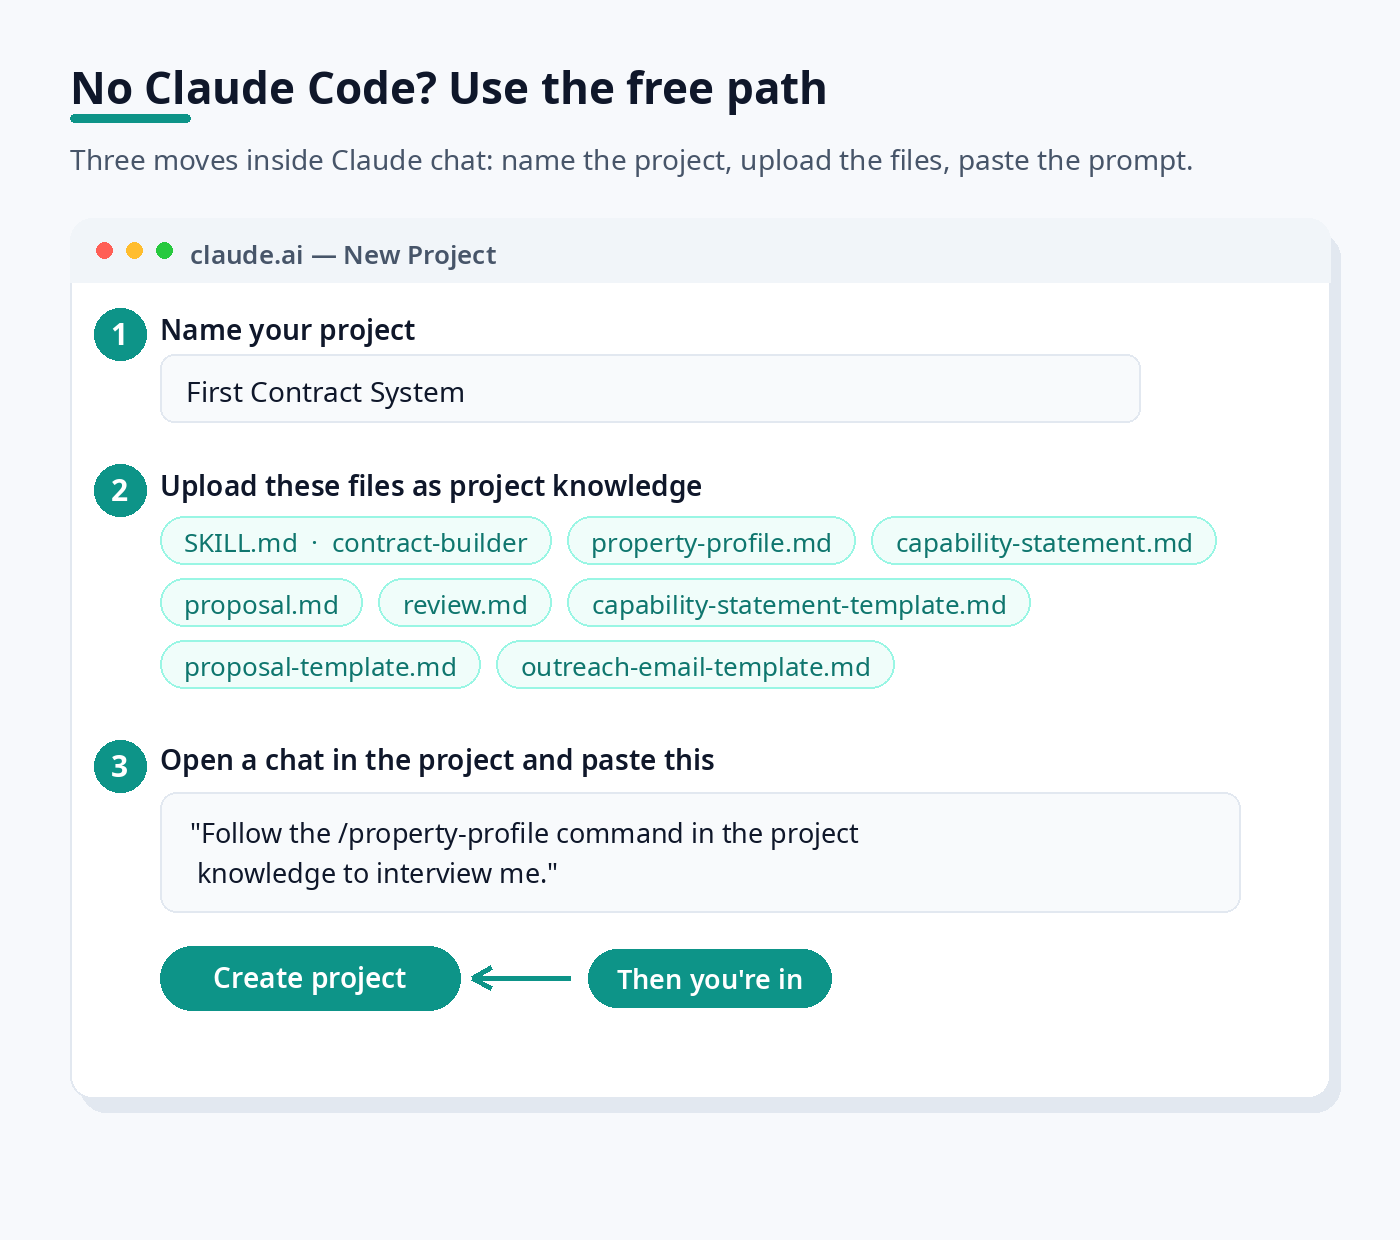
- Prefer the free route? Do it in Claude chat instead: create a Project called "First Contract System" at claude.ai, upload the skill file, the three templates, and the four command files to the project's knowledge, then paste each command's text into a chat to run it step by step. No slash commands in chat — you run each step manually — but the whole system works.
Questions or need a refund? Email info@roadmaplodging.com — 30-day money-back guarantee, no hassle.